The Benefits of Presenting Preschool PBL Work

Published https://www.edutopia.org/article/pbl-presentations-in-preschool

Project-based learning allows very young students to explore, research, and grow their knowledge. Presenting their work to the community validates their efforts.

By Cecilia Cabrera Martirena

March 2, 2023

Credit:FatCamera

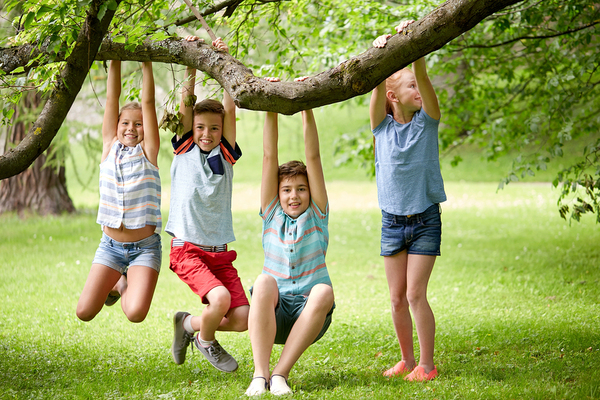
Credit:FatCamera / iStock

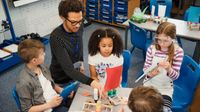
In a project-based learning environment, students build knowledge and develop skills by working collaboratively for an extended length of time on a question or challenge from the real world. For early learners, PBL projects provide an inviting and flexible arena in which to explore, follow their curiosity, and develop different skills and strategies. Sharing their work with the community can further fortify their learning.

In Engaging Children’s Minds: The Project Approachauthors Lilian G. Katz, Sylvia C. Chard, and Yvonne Kogan identify three phases in the life of a PBL project. The first phase encompasses the teacher and learners finding out how much they know about a topic and defining what they’d like to know more about regarding the topic. The learners, with the direction of the teacher, develop questions that will guide them in their research.

In the second phase, which the authors call the developmental phase, the teacher guides the learners in their research and facilitates resources.

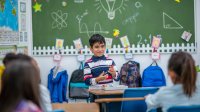
The final stage is the concluding phase; the teacher and the learners find a conclusion to the project, and the children share the knowledge they’ve gained with the community: topic experts, school board members, parents, peers, and teachers. With the help of their teacher, the children explain the topic they’ve studied, the inquiry process, the choices they made, and their conclusions.

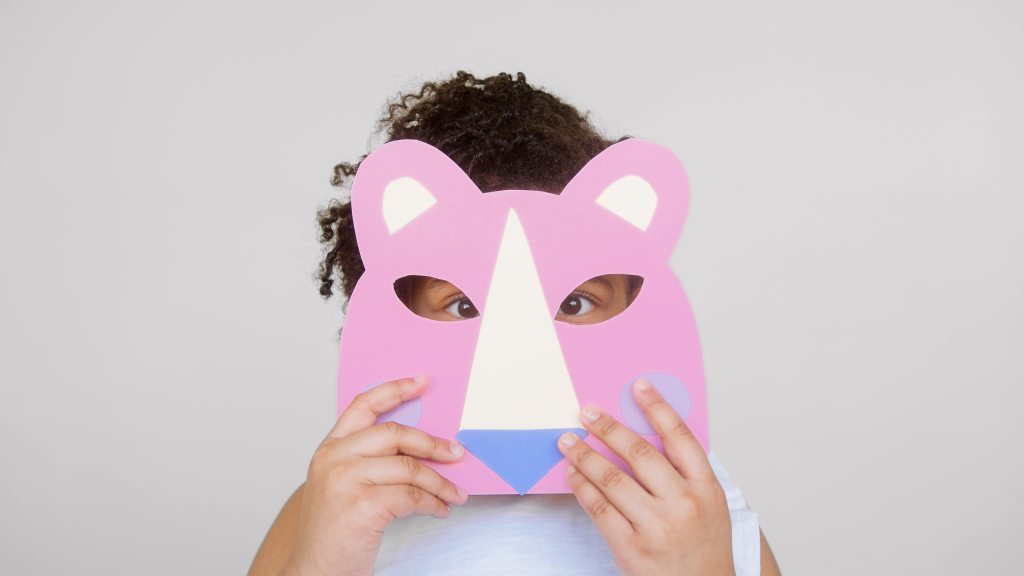
They can use drawings, flash cards, realia, or any other device that might give them confidence during their presentation. The main goal of the presentation is for students to share their learning journey, which will help them develop ownership of their learning and cultivate higher-order-thinking skills. The presentation also shows learners that they can make a difference in their communities and that their voice counts.

PLANNING A PBL PRESENTATION WITH YOUNG LEARNERS 

Let’s say there’s a group of 4-year-olds who observe that raindrops don’t penetrate the leaves of a nearby plant. From this observation, they raise the question: How can we make a roof for our playground out of leaves?  

It’s paramount that during the different phases and steps of the project, the teacher and students collect documentation and the students learn to keep records of their work. So, for the above example, it would be appropriate to document the research process through photographs, drawings, audio and video recordings, oral reflections, questions from the learners, and observations of leaves and water. Using a magnified image of a leaf, the learners can also document how its structure prevents the water from penetrating the leaf. 

It might also be helpful for a botany teacher or specialist to explain the structure of a leaf to the children and the effectiveness of leaves as essential materials for the construction of a roof. The learners and teacher may also invite a construction worker and/or an architect to guide them with finding alternatives for a roof made out of leaves. 

The documentation that the children produce needs to be supplemented with audio recordings of the teacher talking about a specific observation, conclusion, or question. Photographs of the children working at different stages of the research process can also serve to document the learning process. 

ORGANIZING THE PRESENTATION

It’s advisable that at different intervals during the PBL project, the teacher invites learners to explain to their peers what they’ve done, the steps forward, new ideas, or even what they found irrelevant or useless. This exchange will give learners the scaffolding they need to be prepared to talk to a wider audience.

Additionally, it would be helpful to display the documents of the learning process in the classroom and for the teacher to refer to them on a daily basis. This will help the learners recall the process from the start of the project to the present and reflect on the ups and downs of the research path. 

To organize the presentation, the learners and the teacher decide which documents best show the learning path, and then they choose how they’ll display these documents on the day of the presentation to make the process clear for the audience and to make it easier for the learners to use the documents to support their talk. 

THE PRESENTERS

Generally, when teachers and early learners are beginning to work through PBL,  teachers prefer to work with the whole group and at times organize the learners in small groups or teams for specific tasks. This allows the teacher to better lead the learners and closely monitor their progress. Once the learners and the teacher are familiar with PBL group dynamics, working in small groups will be more frequent.

If all the learners will be presenting the same project, they need to be organized so that the teacher and the learners arrange a sequence of presenters that follow the project steps in order. Rather than have the students memorize the text of the presentation, let them explain the learning process spontaneously. It’s important, of course, to practice in class and check when and how to use the resources, as well as how to manage hesitation, timing, taking turns, and speaking clearly and loudly enough.  

THE AUDIENCE

The role of the audience is fundamental. There needs to be interaction between the audience and the children so they see that the community members (parents, teachers, experts, peers, school board) are interested in their work, maybe even asking the presenters some questions. For this reason, it would be a good idea to give the audience a guide to the kinds of questions they may ask—for example:

  • What would you have done differently if you did this project again? 
  • What would you like to add to this project if you had the time and resources?
  • If given more time or resources, what would you have changed in the research/data collection process? 
  • Did you consider other solutions to solve the problem? 
  • What was the most difficult moment in the project? How did you solve it?
  • What was the most amazing moment in the project? 

As curriculum and instruction specialist Dr. Candice Wilson-McCain says, “Public showcases allow students to celebrate their work and give them the sense that their work is valuable and has meaning beyond receiving a grade.” 

Very young children are naturally curious and willing to inquire, find connections between objects and facts they discover in the world around them, and share their discoveries. As a result, if we invite those marvelous minds to fly high, they will unquestionably have the opportunity to shine.

Responding to the Needs of Every Young Learner

https://www.edutopia.org/article/4-ways-to-meet-the-needs-of-young-learners

All children start their school careers with sparkling imaginations, fertile minds, and a willingness to take risks with what they think.” —Sir Ken Robinson

Elementary school learners generally vary greatly in their learning readiness, their interests, and their learning profiles, as Carol Ann Tomlinson, William Clay Parrish Jr. Professor Emeritus at the University of Virginia’s School of Education and Human Development, has explained. 

Teachers understand the different challenges each learner may need to master to thrive and sustain their intrinsic motivation to discover the world around them. Here are strategies to differentiate instruction in any one or all of four areas to successfully meet learners where they are.

CONTENT

This area refers to the concepts, competencies, and information that children need to learn or develop. One effective path to differentiation is to use a KWL chart and display it in the classroom for everyone to see. This chart has three columns: What I Know, What I Want to Know, and What I Have Learned.

The chart might have another column, for KWHL: “How to learn” about the topics or questions in the second column, What I Want to Know.

As learners work to complete this chart, their developmental and learning needs will become visible to the teacher and themselves, giving teachers the information they need to design a suitable learning process.

PROCESS

This is how the learners will work in order to learn the content (concepts, competencies, and information) in a meaningful way.

One possible strategy might be to group learners according to the content they want to learn and plan different activities on the topic at hand using Bloom’s Taxonomy as a reference. Some learners, therefore, will be working on understanding the topic and remembering some key vocabulary, while others may be working on analyzing or evaluating different aspects of the same topic.

At the same time, there might be other learners creating documents, dialogues, or even games based on the knowledge they had and the new knowledge they’ve learned to answer the questions they have set in the KWL chart. As a result, the teacher will be working with one broad topic but will allow learners to meet the challenges they’re ready to face and to develop the skills that will make it possible for the learners to succeed. 

PRODUCTS

In this area, differentiation is possible by varying how the learners will show they’ve learned the content (concepts, competencies, and information), through applying the learned knowledge and even extending that content.

The teacher will need to let go of some control and allow learners to show their learning through a wide diversity of evidence of achievement, and then invite the learners to use different resources such as a game, a dramatic play, a poster exhibition, or a podcast, according to the learning process they went through.

LEARNING CONTEXT

Teachers can use different learning contexts to invite learners to participate in the learning process. Teachers need to offer all learners a safe and motivating context, designed or chosen according to the learner’s previous knowledge, the content areas each learner is willing to learn more about, and the skills the learners need to develop. The learning context might be in person or virtual.

As an example, here’s a plan for a first-grade (6-to-7-year-olds) class of 27 learners.

The content: While the learners were in class, one learner spotted an ant and asked, “Why do ants come into the classroom?” Immediately many learners provided possible answers: 

  • Because they are cold
  • Because they are looking for food
  • Because they are lost
  • Because they are lonely

The teacher then started a KWL chart. As many of the learners didn’t read or write yet, the KWL was created with drawings and one or two words. Then, as a group, they decided how they could gather information to answer that first question, and some possible research routes were designed:

  • Ask parents, grandparents, or caregivers
  • Ask a veterinarian, later changed to a biology teacher
  • Ask the teacher next door
  • Ask older students
  • Google it

The teacher divided the children into groups to start the research. All the groups worked at school under the guidance of the teacher, but the children were invited to ask their parents, caregivers, or grandparents at home. The different groups were in charge of different tasks.

Group one (learners who had developed writing skills): In charge of writing down the ideas from the class for the questions to ask a veterinarian, later a biology teacher.

Group two (learners who needed to develop social skills together with strong-skilled learners): Preparing the interviews of the teacher next door and older students. 

Group three: Looking for information on Google or YouTube. 

Group four: Searching for information in science books—strong and developing readers were grouped together.

Group five: Organizing the information gathered and displaying it on the bulletin board. 

This is how it all started. The groups were reorganized after this first stage of collecting information, and new paths of learning were designed. 

When learners feel they are all being considered in the learning process, they’re open to walking the path of developing and growing. They know they will fail sometimes, but their peers and caring adults will be there to help them move on steadily.

Formative Assessment in Project-Based Learning

Elementary teacher helps a small group of students working on a project
SolStock / iStock

Assessment can be a challenge for many teachers who’ve adopted the project-based learning approach. The learners develop so many areas and skills using PBL in each session that it can be difficult to decide what, how, and when to assess the learners’ development.

I’ve been using and refining PBL since 1997. From my experience, as the project is at the core of the course, learners need to do the work in class so that teachers can be present for the entire learning process. In this way, teachers and learners can take full advantage of formative assessment techniques, from the moment the project begins, through the planning stages and the organizational steps, to the final moment when the students present the project to the community.

ASSESSING LEARNERS BY COLLECTING DATA 

Collect samples of the learners’ work during the period of time you want to assess. Then, use these samples to discuss with each learner the headway they’ve made. This allows them to see their progress, their strengths, and the areas that need further practice.

For example, if a language teacher wants to assess the learner’s writing skills, it’s helpful to look at the different written texts the learner produced during a certain period of time—drafts and summaries, notes on specific events, or texts explaining the learner’s opinion on a given topic or research procedure, as well as the graphic organizers they created and/or completed. All of these documents will be part of the assessment of the evolution of that learner’s writing skills.

Photographs and videos of the learners at work. For this you’ll need to have written parental permission and express clearly how you’ll use the photographs and video recordings. If you plan on uploading any of these to the web, you should also share that information with parents and take the safety precautions necessary to protect the students’ identities. Photographs and videos of the learners while they’re engaged in their work, participating in a discussion, interviewing others, sharing materials, looking for information, creating, and drafting are some of the best ways to document their performance and progress.

Keeping a visual record of the process the learners are going through as they think, explain, decode, and search allows them to observe their work, reflect, and make decisions about moving forward, with the guidance of their teacher and peers. You can share those documents with the learners or with the whole class and assess different areas of knowledge.

In addition, once the learners have seen and reflected on these documents, you can share them with the families, letting the students explain their learning process. This will show the students’ cognitive development, their critical thinking skills, the development of their growth mindset, and their command of the concepts and content at hand.

Project wall. Project walls are dynamic teaching and learning tools that guide project management throughout the endeavor. The learners make a diagram of the different components of their project, the resources they have, and those they’ll need, as well as an estimated deadline, and place the diagram on the project wall. As the project unfolds, the learners document the display in the classroom for the class to see, comment on, and assess. You can create the project wall on a bulletin board, a physical wall, or online to share with the learners through the school’s learning management system.

Interact with the learners and ask them about their process, needs, and objectives. For example, if they are working on statistics and processing the information from a survey they conducted as part of their project, help them reflect on the number of samples they have, how they’ll analyze the data, how effective the survey was, and how they chose the respondents for the survey. Then help them reflect on more specific points related to how they show the effects of the data from the survey.

Teamwork. Help the learners reflect together on how they’re working as a team, how the workload and activities are distributed among them, how reliable the work of each member is, and how they can improve their work as a team. Assign some time weekly to reflect collectively on how things are going, any issues, how they solved problems, and how they’ll continue working to accomplish their goal for the project. This social and emotional component helps the learners to grow in this area and is fundamental to observe.

Assessment is an area that stimulates many emotions. The sooner learners become familiar with a clear and transparent assessment process, the better, starting with the early years. This will help them develop critical thinking skills and be open to giving and receiving constructive, timely feedback from peers, teachers, and experts in the topics they’re working on, and make the most of that feedback, without feeling frustrated or discouraged.

I welcome sharing assessment steps with learners; they’re honest, objective, and tuned-in assessors. Guide them, and they will gain enough confidence to show you the best way to work together in assessing their performance and achievements.

A story everyday to thrive and succeed. 

By Cecilia CABRERA

From my experience as Early Years English teacher, head and researcher, I would like to share with you my ideas, tips and reflections on the amazing power of stories and storytelling in the development of Early Years language learners.  It would be great if you manage to try some of the ideas described below, adapting them to your teaching context. To begin with, let me share with you what I believe about stories, in this simple poem I wrote: 

Tell me a story to recall

Tell me a story to imagine

Tell me a story to discover

Tell me a story to wonder

Tell me a story to reflect

Tell me a story to feel

Tell me a story to connect 

Tell me a  story to learn.

Tell me all kinds of stories, so I may thrive. 

Stories and picturebooks, have always been an endless resource of pleasure, discovery and learning. Gopkin (2016:125) says, “My idea of heaven is to sit on the sofa by the fire why a three-year-old, a mug of cocoa, and a stack of picturebooks…” and it does not surprise me she mentions a little child and picturebooks. Early years learners’ bring to the storytelling  session, their eagerness to be amazed, puzzled, challenged and develop empathy, and make from storytelling a magical moment, to mention a few aspects. 

With this in mind, there are some guidelines I would like to share with you in relation to two aspects: How to choose the appropriate story and how to use the story in class. 

  • How to choose a story for Early Years Learners
  • First, I find teachers need to define the purpose of the story: if the story is part of a research process the learners are carrying out,  if the story triggers a new learning path, if the story comes to bring a closure to a topic, project or sequence of learning sessions. According to the moment in the learning process the learners are in, it is the story teachers need to choose. 
  • Secondly, teachers should choose authentic books for Early Years. If possible, choose books for native speakers, with the richest and widest range of vocabulary appropriate for the developmental stage of the learners.
  • Thirdly, choose picturebooks with pictures of good quality. As mentioned by Fang (1996) “picturebooks can serve as an effective tool to stimulate and promote children’s creativity” and he adds “illustrations in picturebooks allow young readers not only to become aware of the variety of artistic styles and media that artists employ but also develop a sense of judging quality”. He quotes as well Jacobs and Tunnell, (1996:34) “picturebooks to be a perfect vehicle for opening a child’s eyes to the beauty and power of art”.
  • Fourthly, the importance of books with repetitive patterns: I am sure most of us have enjoyed  those stories either as a learner or as a teacher. Those stories with repetitive lines allow us to anticipate the following action in the story, to learn and practice the language and understand clearly the meaning of the sequence of events.  
  • How to use the picturebook in class. 
    • I generally invite teachers to read the same story everyday for at least 5 days in a row. Every time you read the story, children will feel more confident and more eager to participate in telling the story. 
      • The first time you tell the story: mention the author and the illustrator for them to start developing their academic honesty. Allow learners to predict from the front cover what the story will be about, the characters, the timing, and any other aspect you might find relevant. Tell the story avoiding too many interruptions in the flow of the story, children want to know what happens and how it ends! Just stop to clarify the meaning of actions, or mention something relating to the picture. 
      • The second time you may invite learners to pay attention to the pictures, and introduce vocabulary. It might be extremely interesting to ask learners to express how the scene might feel, the smells, the sounds in the story. In addition, because of the repetitive language, some learners might feel confident enough to repeat some phrases. 
      • The third time, invite learners to “help you tell the story” and provide parts of the words text. At the same time, ask learners more questions about what is shown in the pictures. The colours used, how the characters and setting are drawn. It would be good to ask about the feelings of the characters, the choices they have made, and even what the children would do if they were a certain character in that context.Teachers may also elicit the parts of the body, clothes, actions, or any other vocabulary items the learners are working with or take the chance to review.  
  • The fourth time, it would be good for teachers to repeat some of the work they did the day before with the pictures. In addition, it would be very beneficial to invite the learners to go a bit further and invite them to tell the story together with the teacher. In some cases, learners would enjoy providing the voice of the characters or roleplaying the story, even using costumes or masks. Children may also enjoy having the story in pictures and arranging the pictures in the proper sequence of the story. 
  • The last day, learners will be given total autonomy to take turns and  tell the story to their peers. More role-play and more making the voices of the characters. 

This scheme of work helps the learners to learn and incorporate structures and a wide range of vocabulary to their own repertoire. It would be quite common to see the children playing freely and using some chunks of language from the story. Learners will have been using authentic language, learnt meaningfully through an activity that was engaging and fun. 

I will explain this better with the example below: 

Story: The Very Hungry Caterpillar by Eric Carle.  

In this story, teachers will  find repetitive structures in the first half and then changes to long rich sentences most which the children will understand, some would be able to remember chunks and even others will be even capable of repeating it completely. 

This story provides some learning context to work on different topics that might be of interest to the children, as for example:

  • Day and Night – Moon and Sun
  • Numbers: 1 -5. 
  • Fruits and Vegetables
  • Variety of foods
  • Healthy and Unhealthy food
  • Feeling unwell. 
  • Days of the week 
  • Caterpillar life cycle
  • Illustrations in stories. 
  • The use of colour in stories, different techniques. 

With reference to the reading sequence I mentioned above, in the case of this book, I would suggest: 

  • Reading 1: Teachers show the children the front cover, mention the author/illustrator, elicit if they have ever seen a caterpillar. Teachers guide the learners to see the colours and shade of colours in the caterpillar’s body. After this, teachers tell the story, making stops if they find it necessary for the children to follow the sequence of events. 
  • Reading 2: Teachers elicit from the children how much they can remember about the story. At this moment, teachers allow learners to add information to the story by connecting pictures and the story with the senses. Learners participate even in their mother tongue and teachers provide some key lexis and vocabulary as they speak. For example: if the child wants to say, “The caterpillar ate apples”, teachers may provide the words (even after the child has said it in his/her mother tongue). Teachers then tell the story from the beginning in the same way they did the day before, but in this second reading teachers may choose to stress one aspect of the ones listed above, for example: numbers 1-5. Then, when the it comes in the story the moment when the caterpillar eats the different fruits, teachers may for instance, show the flashcards with numbers on, so children can start connecting the number of items with the written number. Teachers finish telling the story and then, go back to the concept they are working on, as the example of numbers. 
  • Reading 3: Teachers elicit the title of the story, author/illustrator, some main features of the character. Then, the teacher elicits what the children can remember about the story and starts telling it again. As the teacher reads the story aloud, he/she invites the  learners to provide some words, chunks of language. Then, he/she invites learners as well to notice how the different drawings are created, the shades of colours and the items in the pictures. At this time, it would be interesting to elicit the different aspects of the life cycle of the caterpillar and explain the concept of metamorphosis. Teachers might be interested here to ask the children to find out at home if their parents, or grandparents know how long it takes for a caterpillar to become a butterfly. Children will be invited to share that information with the class the following day and check that information with the story. 
  • Reading 4: Once more the teacher elicits the title of the story, the author/illustrator and any other aspect from the front cover or back cover the teacher may find relevant. The teacher invites the learners to share the information they have brought from home. Then, the teacher tells the story as he/she invites the learners to tell the story together with him/her. At this point, it would be nice even to ask different learners to act out as the caterpillar while the story is being told. Again, revise numbers, grouping and counting and the life cycle of the caterpillar and the concept of metamorphosis. 
  • Reading 5: As said before, in this stage learners will be given total autonomy to take turns and  tell the story to their peers. They will also be invited to become narrators/actors and use their bodies to show the changes in the caterpillar. To round up, the teacher reads the story one last time for the children to relax and enjoy. 

This is simple an example of the activities that can be done as the list is quite extensive, depending on the aim of your class, the age of the learners or the developmental stage of the children in your class. However, it would be wise to focus on not more than one or two topics in each story. That would be more than enough, taking into consideration that the learners are also learning the language (structures and vocabulary) involved. It would be an effective decision to create different activities to be done in class and beyond the school walls, where the learners have the chance to use the new language they have learnt from the story. At the same time, through spiral learning activities, the learners will have the chance to recycle the language learnt and consolidate it. 

What can you add to this post from your experience?

Gibb(2016) explains that , According to research by the OECD, reading for pleasure is more important than a familys socio-economic status in determining a childs success at school.

Fang, Z. (1996). Illustrations, Text, and the Child Reader: What are Pictures in Children’s Storybooks for?. Reading Horizons: A Journal of Literacy and Language Arts, 37 (2). Retrieved from https://scholarworks.wmich.edu/reading_horizons/vol37/iss2/3

Gibb, N.(2016), https://www.gov.uk/government/speeches/the-importance-of-storytelling

Gopkin, A. (2016) The gardener and the carpenter: what the new science of child development tells us about he trelationships between parents and children. Picador, NY.

3 Essential Tools to Foster Students’ Oracy Skills in the Early Grades

Teachers can help young learners develop their oral language skills with a few simple efforts to prioritize speaking and listening in class.

By Cecilia Cabrera MartirenaJuly 16, 2021

This article was first published on Edutopia https://www.edutopia.org/article/3-essential-tools-foster-students-oracy-skills-early-grades

When children engage in spoken dialogue in their early years, they learn how we make sense of the world, how we use language to reason, how we express emotions and identities, and how to work together to solve problems and get things done. As early education teachers, we offer learners the chance to develop their oral language skills, which are one of the first communication tools that children use to interact with others, form relationships, and, of course, learn.

Oracy skills pertain to the development of oral language—for example, tonal variation of voice and clarity of pronunciation, appropriate vocabulary choice, turn-taking, storytelling, and so on. Here I’ll discuss three powerful tools to help early learners develop oracy skills.

1. THE ENVIRONMENT

How children interact with their environment may trigger and facilitate the development of rich language.  

Circle time: Set a clear area, with a carpet or a circle painted on the floor, that looks inviting. Children can sit in this circle at the beginning of every day, or whenever the teacher finds it necessary or relevant, to share experiences and feelings or to sing or play.

Bulletin boards: Put bulletin boards within the learners’ reach. Organize the information on the bulletin boards in a clear and planned manner. For example, arrange information related to fruit and vegetables in two large squares, one for Fruit and one for Vegetables, with letters large enough for students to read from anywhere in the classroom. Add pictures next to the words, but avoid overloading the bulletin boards.

“Write” sentences with iconic writing (using pictures to construct sentences), so that learners can “read” short sentences. For instance, “I like (picture of grapes), but I don’t like (picture of strawberries).” Renew a part of the bulletin board every two weeks.

Books: Read storybooks every week, and put the books within the learners’ reach. Place a carpet or cushions where learners can sit and read aloud to themselves, to dolls or stuffed animals, or to each other. As they turn the pages, the children will imitate the teacher telling the story. When they repeat well-liked parts of the story, they’ll be practicing not only the language, but also the pronunciation, intonation, and even body language.

Routines corner: In one corner of the class, within the reach of all learners, place a weather chart and ask them to describe the weather each day and make the necessary changes to the chart. This is a special corner where learners can see pictures of different kinds of weather: sunny, rainy, windy, snowy. Then invite the children to complete sentences such as, “Today is ____ and ____,” using those pictures.

In the same corner, have a complete register with a photograph and the name of each child for calling attendance every day. Once most of the children have arrived, point to the pictures or names of the learners and invite the children to say if that child is present or absent. Or, just ask the children to say their favorite color when you name them, and then invite the child to pick the corresponding colored paper and place it next to their photograph. If a child is absent, that child won’t have a colored paper next to their name that day. 

Mirror: Place a mirror on the wall at the children’s height, so they can see their whole body. Then invite them to touch the different parts of their body on the mirror, make faces, and use body language to express a feeling or emotion and then describe what they’re feeling. If they have fun with this activity, have them play a game like Simon Says says while they’re watching themselves in the mirror.

2. TIME

As teachers, we know our lessons need to have a special rhythm. Children generally arrive full of energy and eager to play with their classmates and excited about what they’ll discover and learn. Welcome learners with some playful activities for a few minutes, such as building games on the carpet or some hand-clapping games like pat-a-cake, and then invite them to go into the circle.

Organize class time so it comprises about 70 percent oral work and 30 percent pre-writing tasks such as tracing, coloring, or completing puzzles. Distribute the amount of time devoted to oral work, which includes telling and retelling stories, observing feelings and emotions linked to actions and reactions, and so on, throughout the entire class time.

3. FEEDBACK

Effective feedback needs to be timely, encourage learning, and foster critical thinkers and resilient learners. Different types of feedback work well with early learners.

Feedback from the teacher: Take the time to give each learner rich and descriptive feedback whenever possible, but at least once a week. It’s important that the teacher devote time to interact with the learners, asking them about the different decisions the child has made, or asking about activities or tasks the child might find motivating, interesting, or fun. This information can help make teaching more effective.

The teacher can use a routine—for example, two stars and a wish (two things you like and one thing you’d like to see done differently)—to structure the feedback to the learners so they can understand and replicate the technique.

Feedback from peers: Peer feedback can utilize this same technique. For instance, say that some of the children in class have just finished role-playing Goldilocks and the Three Bears. The teacher asks the other children who were the audience to provide feedback using the two stars and a wish technique. One child might say something like, “One star for the amazing performance of the child who was Goldilocks.” Here the teacher has the chance to ask, “What makes you say so?” Or just let the child move on to the second star. The child says, “Another star for the performance of the child who was Baby Bear, when Baby Bear found his chair was broken.” The wish might be, “I would like to see Papa Bear more angry and fierce.” This kind of peer-to-peer feedback can be very constructive.

“Much of what we learn from language is indirect. We draw conclusions from the details of the person’s intonation, gestures, choice of words, or syntax in subtle, complex ways,” as psychologist Alison Gopnik has written. Early education teachers are key when it comes to giving young learners the oracy skills that allow them to communicate effectively, using all of the nuances of language.

10 Tips for Successful LIVE Remote Teaching sessions

Covid-19 refuses to leave the place of prominence in 2021, and as a result, in many countries teachers and learners are going back to remote teaching or those lucky ones, are working in a hybrid teaching and learning context. 

Therefore, I find it necessary to lend a helping hand to teachers and coordinators trying to make learning happen and keep motivation up.

In this post,  I will address 10 tips for remote synchronous teaching sessions (that is live sessions)  and in a future post, I will be talking about tips for asynchronous teaching and learning (that is instructions for autonomous learning). 

TIP #1 – Explain clearly to parents, how you and your learners will be working in these live sessions. Explain what is expected from the learners, and how parents, can help without intruding.

Tip #2 – Check connectivity: In many countries, there are problems with connectivity. Some teachers and learners do not have access to a steady wifi connection. In this case, using WhatsApp might facilitate communication. It is a good tool to make video calls, send short videos and documents. 

TIP #3 – Ask all learners to leave their cameras ON while they are in class. 

Tip #4 – Check all learners are in a quiet place where they can concentrate in the lesson, if not, communicate with parents to explain how important it is for the learners to have a proper place where to connect to the lessons. This doesn’t mean a special room or anything of this kind. Just a quiet surrounding for the minutes the child will be in class. 

Tip #5 – Observe the faces and body language of your learners, see if they look anxious, stressed, demotivated, sad, bored. If so, ask the learner to stay connected after the class and have a chat with him or her; when necessary, schedule a meeting with their parents. 

Tip #6 – Reflect on your teaching after the lessons are over. Plan your next lessons carefully, according to your reflections and the learners’ performance and reactions. Remember the learners’ behaviour reflects their engagement and enthusiasm. 

Tip #7 – “The good, if brief, is twice as good” Spanish Saying. Make your lessons short ( not more than 20 to 30 minutes for Early Years (2 to 5 years old), 40 to 45 minutes for Primary and 60 minutes for Secondary School learners). Check the activities you plan for the session can they be reasonably completed in the allotted time.

Tip #8 – Devote most of the time of the synchronous session (if not all the time) to ORAL work, TPR activities and Team Work. Allow social and emotional skills to develop while learning the language. (Read here for information on SEL: https://casel.org/what-is-sel/ )

Tip #9 – Promote interaction among learners. Use the synchronous session time to work on Brainstorming activities, role-plays, sharing data from research work,  giving and receiving feedback from peers, storytelling and story-reading any other activities that allow learners to work with their peers. 

Tip #10 – HAVE FUN! Remember motivation is contagious. We know that if you and your learners are motivated, enthusiastic and interested, they will learn more sustainably and enduring. Make these sessions memorable and your students will surely look forward to your next English class eagerly. 

excited kid on computer - FRONTLINE Selling

How Teachers Can Use Pedagogical Documentation for Reflection and Planning

By Cecilia Cabrera Martirena; February 5, 2021

ARTICLE PUBLISHED ON www.edutopia.org; https://www.edutopia.org/article/how-teachers-can-use-pedagogical-documentation-reflection-and-planning

Dear All, I am more than pleased to share with you the article I wrote for Edutopia. I will be looking forward to your comments.

Students generate a lot of documents that show their thinking, and teachers can use that evidence of learning to improve future lessons.

Student takes a photo of their school work with their phone

The Covid-19 pandemic and working remotely have challenged teachers of all grades to be as creative and innovative as possible, including the way they manage pedagogical documentation. With remote work, teachers often assign asynchronous tasks, which can generate large numbers of documents. Many of these documents, when managed appropriately, can be an extraordinary source of reflection and analysis to improve future curriculum planning.

Whether teaching remotely or in class, choosing what to document and how can seem overwhelming. It also can be daunting to determine which documents to consider for future learning needs. Knowing how to choose what lessons to document and how to document them may reduce the amount of work and at the same time make it more effective.

Here are some ideas for managing pedagogical documentation that have proven to help teachers and pre-K to 12 students work together to choose what is most likely to be useful in curriculum planning for years to come.

CHOOSING WHAT TO DOCUMENT

Select a learning session that will likely have benefits beyond documenting the work for the current semester and will hold lasting value for future curriculum planning. Then choose the moments in the learning process that you or your students find most relevant. The documents should show the activities that are most likely to generate reflection, analysis, and the development of creative thinking skills and metacognitive skills. These will have the most to offer for future curriculum planning.

OBSERVING AND DOCUMENTING

The next step is to decide how to make a record of the observation. Choose a technique that will best show the thinking process and learning progression of the students—note taking, photography, audio or video recordings, or a combination of one or more methods.

Families can also provide helpful documentation. For example, the family of a preschool girl recorded her enthusiasm for measuring different objects at home, which led to a follow-up math session. The math teacher used the young student’s passion for measuring as the basis for a class about why people measure things and how to measure using a variety of tools such as blocks, pencils, or hands. One family’s documentation of a student’s love of learning inspired a new math lesson.

THE ROLE OF DIALOGUE

Once you have a suitable sample of documentation, both you and your students may find it helpful to prepare an exhibit about the learning process, carefully choosing the documents that best show the progress of the work.

This can lead to an unstructured conversation in which you ask students about the relevance of the display and ways the display can show the school community how far the students have come. This dialogue encourages the development of critical thinking and provides an opportunity to illustrate the learning process to students and the school community as a whole.

THE PURPOSE OF REFLECTION

This role of pedagogical documentation is different for teachers and students. Teachers reflect to review their teaching method and approach. From the data they collect, they can make decisions about future lessons and the educational evolution of each student.

Students need teachers to help them find the right moment for oral reflection and also to invite them to write or draw their reflections on their learning process. Teachers can ask students questions about what the documentation shows or use a marking criterion so that students can see if they’ve reached their goals. If students haven’t reached their goals, they will be able to see why, as well as what they need to do in order to achieve their goals.

INCLUDING THE SCHOOL COMMUNITY

Teachers should seek feedback from other members of the learning community. When you invite the school community to participate in the learning process, different views and perspectives come into play, which can further support future curriculum planning.

It’s also important to offer the opportunity and provide the resources for families to give feedback. For instance, with the preschool girl who loves to measure everything, the teacher could offer parents and the school community information about the learning process that the young student is using, and provide resources to leave brief feedback about their impressions of the learning process. Then teachers and students can read that feedback and create a new reflection. These are all moments of growth and deep learning.

When using pedagogical documentation in upper grades, the issue is still how much of the documentation is prospective and might shape the design of future learning. For example, if a group of upper-grade students are doing science and environment research on why some communities don’t have running water, it might be relevant to document the experience and the data collected when they visited a water purification plant, and then check what else they need to find out and use that to plan future trips. The documents would then have a prospective objective.

The above example also offers an opportunity for teachers to include math, physics, chemistry, geography, social studies, biology, art, and even performing arts in an interdisciplinary project. Teachers can invite students to explain the purification process through a drama or musical play and assign students tasks in the subjects they need to strengthen. The production can then be performed for the school community.

As long as teachers have the time to work thoughtfully with the documents they’ve collected so that they can adequately reflect and design new paths to learning, and not just view them as documentation of the current semester, pedagogical documentation can help teachers make a meaningful and enduring change in the teaching and learning process.

Teacher Planner II

Dear All,

Here is the link to another version of the Teacher Planner I created. Please feel free to download it , share it , enjoy it!

Here I share the link to a new version of the Teacher Planner I created, this time with paintings of remarkable artists. I hope you like it and find it useful. It is for you to download and use freely. https://www.canva.com/design/DAETDX2dyww/roJRqmsJEwaBT5wGliiprQ/view?utm_content=DAETDX2dyww&utm_campaign=designshare&utm_medium=link&utm_source=sharebutton

Cheers!

Cecilia

After a quite challenging 2020, better equipped teachers will face what 2021 may bring.

During this 2020, we, teachers and educational leaders, were forced to jump into emergency remote teaching from one day to the other. 

The situation for 2021 is not the same. In this case, we have all the experience and knowledge we gained in 2020 to act as back up of our decisions in 2021. We have learnt a lot in many different areas, for example: We have found out how to catch our learners’ interest and attention in remote teaching, we have adapted resources and materials, we have discovered many different platforms for synchronous online teaching, we even enjoyed preparing materials for asynchronous teaching and learning, as recording videos and audio texts.  As a result of the process we went through in 2020 we have collected enough experience to feel more confident to design and create innovative teaching and learning strategies and resources for 2021. 

I am quite sure that next year we will have a combination of teaching and learning contexts, and in my opinion each of them has some pros and cons I want to share with you:

Face-to-face With Social DistancingRemote TeachingSynchronous and Asynchronous Hybrid Teaching /
Blended Learning
COMMUNICATION richer understanding through teacher and other students’ body language and voice.The use of body language and voice in asynchronous teaching is not  spontaneous. However, in well designed videos, they might be much more effective to facilitate communication.Teachers create different channels to allow effective and timely communication with leanrers. 
In either of these contexts, experienced teachers will take advantage of both contexts, online and face-to-face to allow learners dive freely in both contexts and from one context to the other,  to make the most of the teaching and learning situation. 
Teachers will have the opportunity to use the most effective aspect of each contexts, online and face-to-face  and organise the lessons around and successful combination of teaching strategies and techniques. 
TIME Time constraints. Learners have a given time to show up in the class or they miss it . Assignments in face-to-face lessons offer very short time to reflect, share, think and collaborate with peers. Learners can revisit the content as many times as they want. They have more time to address the different tasks and activities. 
FLEXIBILITYMore Flexible: in Asynchronous context, learners can choose when to participate. In synchronous, learners can watch the recording of the synchronic lesson as many times as they want. 
INTERACTION WTH PEERSMore spontaneous interaction, Allows more shy learners to participate as the teacher might have better control of the participation of more dominant learners. Gives  learners time to reflect in Asynchronous participation. 
FEEDBACKMore immediatelack of visual feedback is a common challenge for teachers.
DIFFERENTIATIONTeachers are much more subject to time restrictions and therefore tend to use the “one size fits all” principle with subtle adaptations. Allows teachers to assign different tasks or activities to the different learners according to their interests and developmental stage. 
FOSTER LEARNING COMMUNITIES Group cohesion is stronger. Harder to foster. Social Bonds turn weaker in Remote Learning.  
TEACHER CONTROL AND  LEARNER AUTONOMYTeachers have more control on what is happening in the classroom. Learners tend to be more dependent on the teacher. Learners have mote time and opportunities to develop skills for self learning.Learners are more responsible for deciding when and where they will devote time to learning and access resources. 

I hope this helps you find more support in your future lessons. I am quite sure you do not know yet which exactly will be the context in which you and your learners will be working next year, but I may say, without the need of a fortune teller, that it will be mostly online. If you are lucky, maybe you are allowed to do some Blended Learning which would be absolutely fantastic! Don’t you think so? 

Please share your thoughts, ideas and queries with us, we need to strengthen our professional communities. We need support from each other. Stay tuned!